Interactive performance using Drawdio. Hacking and Buildiing.

For the New project in class, we were asked to work with a new type of technology, that works with simple materials and is easy to build. its called the Drawdio kit 1.1.

During the process of putting together the drawdio kit, I stumbled upon alot of set backs.alot of pieces were broken,my fingers were burned several times from the soldering iron, and put some pieces in the wrong place. at first you have to head the instructions carefully or one might easily get lost. out of excitement I accidentally overlooked some parts of the instructions which resulted in taking out pieces or soldering the wrong part. This required alot of work and concentration.

As the process became faster, you begin to learn along the way how to do many things. My big improvement was with soldering. it becomes fun and easy once things work out, also there was a little instrument called the little helping hand which was there just in case you did need a little helping hand. overall the drawdio kit was completed, and for the most part it was fun and challenging at the same time. It didn’t completely give the result that was intended, but its an accomplishment to complete it.

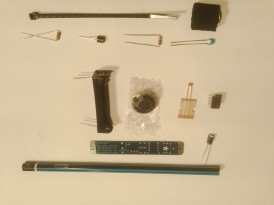
The parts contain many pieces such as: PCB- printed circuit board,timer chip, transistors, capacitors, resistors, AAA battery holder, small speaker, copper foil tape, thumb tack and a pencil.

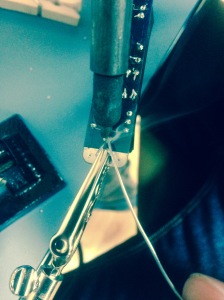
the process of soldering.

parts and pieces of the drawdio kit.

drawdio3

what the finished drawdio looks like.

soldering1

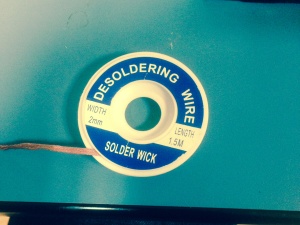
this is the desoldering tape used to remove excess solder on your kit.

soldering4soldering5Drawdiothemaking1

the soldering irons used used to make the drawdio kit complete

making good use of the soldering iron

Teardown- process for maker commons.

My first project in Hacking & Building class was to Bring in an electronic object for disassembling and documentation in class. By disassembling meaning tearing or taking it apart to smaller individual pieces. As a result of this, it helps me to understand the parts that come together to work in order to achieve a main purpose or objective. In today’s society we use and rely on many objects or instruments to make life and many daily activities much more convenient to attain.
This particular project truly answers the question majority of people ask; How does this device function or which parts are involved in the making of this object.
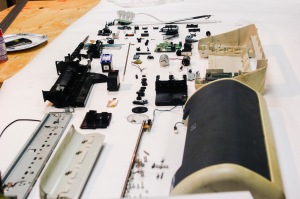
– An old Hp desk-jet printer was intriguing to me,the way it transfers the ink to the paper, prints out a document or picture in full color, which is the reason It was chosen for my class project to Disassemble. At first the thought of how long the process of dismantling the printer would take made it difficult start somewhere. so I started looking for little parts to take out which would make it easier to break down. after a while, you begin to work at a faster pace, because there are similarities in the bolt and screws, that required one or two drivers to take it out. after taking my time to carefully take it apart, everything fell into place which made me understand why the little strange pieces were placed in their position, and its role on the team of printer parts. Inside my printer, I observed there were no wires except the ones connected with the Arduino or motherboard.

The final documentation was very challenging as I wasn’t accustomed to really taking time to document something i have spent so much time and effort on. it certainly felt like an accomplishment and motivates you to go look for more fascinating objects and challenge yourself to dismember it then fully document the before and after of the process. Furthermore, I had to take several pictures of the dismembered pieces and different angles to eventually find the right one that fits the standard of good quality documenting.
This was a learning experience for me because it gave me an opportunity have a new outlook on what it takes to open something up, and see the end result.

image-retouch1image-retouch3 image-retouched4

image-retouched2

courtsey of http://mechatronics.colostate.edu
this is the mother board- which is the main printed circuit board and contains buses that allow data to travel between the various components that comprise a computer
An inkjet cartridge is a component of an inkjet printer that contains ink which is deposited onto paper during printing.
works with mother board
Laser printer scanner motor

CT 137 blog

Hello  My name is Samuel Fagbamigbe. I’m a current student at York college and major in Computer Science and Business. I have been at York for 3 years and have gotten a lot of experience in variety of fields. I’m very open minded about creating new things or seeing how innovation can really improve the society and people’s lives.

As a result of being open-minded and learning new skills which, I had the opportunity of taking CT 137 which is hacking and building. The name was what really caught my attention- Hacking and Building. filled with excitement I was eager to register for the class on time, and begin the amazing process of hacking and building programs. Unfortunately it wasn’t what I intended it to be.  Long story short, I’m really looking forward to advancing my skills and doing something out of the ordinary.